Get the right surface on your 3D print - Four methods for post-processing
Today, the 3D printing technology is so advanced that you can produce items with very fine surfaces and tolerances that can be used in e.g. the food and medico industry – but it does require the right post-processing.
When we talk about post-processing of a 3D print, it covers all the processes that take place when the printer has finished printing. In the first instance, it is e.g. to remove excess powder, and when we talk metal 3D printing, it is also to remove support and possibly heat treatment to remove stress from the items. Then comes the processes to ensure that the surface gets the desired finish.
The various post-processing steps are often underestimated, but in many cases, they are crucial to achieving a usable result. Out of the printer, the items have a surface that is rougher than what is typically known from milling and turning processes.
Let us help you with 3D-printing produktion
The surface roughness is often listed as the Ra value, and it covers the average of the height differences on the peaks and valleys of a surface - the lower the Ra value, the smoother the surface. By comparison, the Ra value right out of the printer is around 8-9, but the rule of thumb in the food industry is an Ra value of 0.8 - in other words: Some work needs to be done to get there.
Team Manager Mads Østergaard has helped numerous companies develop, print and post-process 3D-printed items, and among other things, he teaches in our course 'Professional 3D printing in practice. Below, he gives you an insight into four different methods for finishing 3D-printed surfaces, which we use at the Danish Technological Institute.
1. 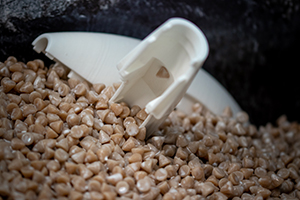 Vibration deburring
In the case of vibration deburring, the process takes place by placing the 3D-printed items in a vessel with abrasive chips, after which the vessel is set in motion together with the items. During deburring, the items are not in contact with each other, but only with the abrasive chips. The chips are adapted to the design and weight of the items, and they can e.g. be ceramic or plastic, which contains an abrasive - the same way as we know it from sandpaper.
Vibration deburring can be used for virtually all items - both metal and nylon - and the treatment removes all the small powder grains that adhere to items in the printing process. After the treatment, the surface roughness, which is stated as the Ra value, can come below 1 - depending on the geometry of the items and how long the deburring has lasted. However, the treatment does not enter internal channels on the items, so it is a good idea to combine it with other finishing processes if there are internal channels that need to be treated. The advantage of vibration deburring is that the equipment is not so expensive and that it is easy to set up.
 2. Blasting
This method involves accelerating small particles of e.g. glass, sand, or corundum towards the surface of a 3D-printed item under controlled conditions. The material for blasting is selected according to which material the 3D-printed item is made of, as well as which surface structure is desired. Corundum, for example, is good for removing tops on hard materials such as titanium and tool steel, but it can leave the surface rough if left alone. Therefore, you can 'smooth out' with the help of a subsequent glass blasting.
Blasting is particularly suitable for 3D-printed metal, but in some cases the method can also be used for plastic. The surface roughness after blasting is typically an Ra value of 2-3, but with a geometrically optimized recipe it is possible to get all the way down to 0.8.
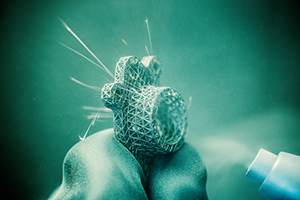
3. Micro Machining Process (MMP)
The MMP method is a patented catalysis technology used for 3D-printed metal items. The process is a batch process where many identical items are processed at once in a precisely optimized process. This treatment takes advantage of the fact that the treating liquid penetrates all channels, so it is not only the outer surfaces that have lower roughness.
With roughness down to less than Ra 0.08, this treatment is often used for implants and rapidly rotating equipment such as turbines.
4. 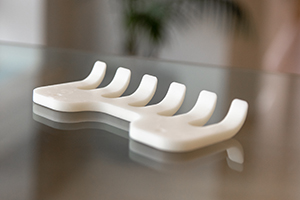 3S - Super Smooth Surface
3S is a steaming process that the Danish Technological Institute has developed to surface-treat 3D printing in nylon (PA). The treatment is approved for food contact and can be performed on both raw and deburred nylon. The 3S treatment creates a chemical change to the surface, which makes it both water-resistant and extra smooth - and thus easire to clean. In fact, a 3S-treated surface is 117 times better than untreated nylon measured on residual bacteria and at the same level as turned stainless steel.
The treatment has been developed at the request of the food companies for more easy-to-clean surfaces, and it can bring the surface roughness down to an Ra value of around 0.8 - without changing the dimensions or strength of the item.
In addition to the examples mentioned, there are several other methods for post-processing, including traditional methods such as grinding, milling, turning, and polishing.